Main Features
◆ Fast testing speed, improving work efficiency;
◆ Direct reading of withstand voltage and high-voltage leakage current, with automatic identification of unqualified test samples, high intelligence;
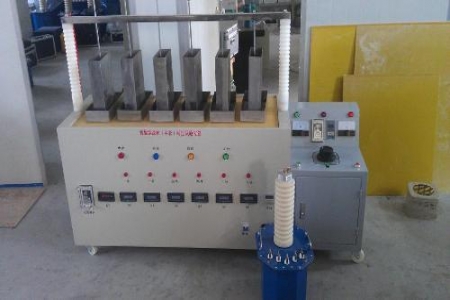
◆ Can test 6 pairs of insulating boots (gloves) simultaneously, and read the leakage current of each, accurately identifying unqualified insulating boots (gloves);
◆ Casters are installed at the bottom of the structure for easy movement. Technical Parameters
1. Input voltage: ~220V 50Hz
2. Output voltage: 0-50kV
3. Capacity: 3kVA
4. Number of test samples: 6 pairs each time
5. Measurement data: can display and print the voltage value and leakage current value of each tested sample
6. Overcurrent protection; overvoltage protection; custom time, voltage, and leakage current values
7. LCD display, full Chinese menu operation, with printing
8. Measurement accuracy: voltage ±2% (±3 digits), current ±2% (±3 digits)
9. Weight: insulating boots (gloves) operation box 12 kg, power frequency withstand voltage test bench 60 kg
Test Procedure
1. Add two-thirds of water to the water tank and fix it on the insulating platform.
2. Place the insulating boots and insulating gloves filled with water into the water tank. The insulating gloves are clamped with the insulating clamp on the probe. The upper openings of the insulating boots and insulating gloves must not be wetted; keep the upper openings dry.
3. Adjust the tightening screw on the high-voltage tube, insert the probe into the water inside the insulating boots and insulating gloves, and tighten the screw to fix the probe.
4. Ground the water tank box connection post, connect the water tank box socket to the control box output socket, and turn each milliammeter switch on the water tank box to the "Off" position.
5. Connect the control box power socket to a 220V power supply and ground the grounding terminal.
6. Set the test time and overcurrent protection value.
7. Before turning on the power, return the voltage regulator to zero, close the knife switch, and the disconnect button light will be on. If alarm is needed, press the alarm switch, and the alarm will sound and flash. Press the start button, the start button light will be on, and the alarm stops, indicating that power is on and waiting for voltage increase.
8. Rotate the voltage regulator handle clockwise at a constant speed to increase voltage, and closely monitor the control box instruments and the water tank box milliammeters.
9. If any milliammeter in the water tank box is abnormal, turn the corresponding milliammeter switch to the "On" position to protect the milliammeter from overcurrent damage.
10. When the required voltage is reached, turn on the time relay switch, and the time relay starts timing.
11. When the time relay reaches the set time, the alarm sounds again to remind that the withstand voltage time is up.
12. Rotate the voltage regulator handle counterclockwise to reduce voltage, then turn off the time relay switch and press the disconnect button, pull down the knife switch, and the test ends.
13. Unless allowed by the test, never suddenly cut off power.
14. If the test sample short-circuits or breaks down during the test, the overcurrent setting device will operate to cut off the high-voltage output.